 |
| ECE Standalone Follower - Head Problem After Removing ECE And The Solution |
Tension to find solution everywhere when you found out the follower you just created end up like a sh** once you remove
Enhanced Character Edit (ECE) from
NMM etc. You follow every single step from the tutorial and still messing up before you want to share it somewhere. Head moprh is a real problem.
This tutorial is for Enhanced Character Edit (ECE) user only. For this tutorial i'll use female follower.
Someone out there shared a nice to tutorial and beginner like you really want to make it through and DON'T WANT step into a problem that you can't solve and there is no tutorial to tell you how to do it. Testing your follower without involved another mod and found out your follower/npc head morph doesn't appear to be shown like you want or not similar like you created using ECE earlier. There is a solution to solve this problem. You check out the NIF located in facegeom folder from data\meshes folder path.
Data\meshes\actors\character\facegendata\facegeom\yourfollower.esp\xxxxx.NIF
Open your NIF file using a
Nifskope and select the
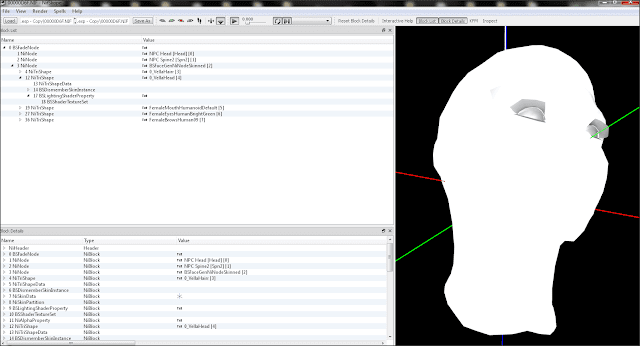
Head section like picture shown below. Look at the
block details located at the bottom of your nifskope, there is a five texture path (green highlight) shown that it point to another folder from data\textures. At the top, only one point to right path while another four stick on vanilla. What you have to do is change the vanilla path to yours.
Vanilla base path : Data\textures\Actors\character\female\xxxxxx.dds
The red highlight shown above is optional, the path related to your follower face tint. Creation Kit (CK) and ECE generated facegendata with different path. If you planning using ECE facegendata (only latest ECE can do this via export head option), you need to change facegendata path created via ECE into CK facegendata path.
You to need change the path of _msn.dds, _sk.dds and _S.dds only. The path must point to your custom path you created. For example,
Data\textures\Actors\character\from this point is your custom texture path
let say your custom path is
Data\textures\Actors\character\Follower Vella\femalehead_msn.dds
If you use custom name for dds file you need to insert with same name. Example, your change femalehead_msn.dds to vella_femalehead_msn.dds and you to insert the path like this,
Data\textures\Actors\character\Follower Vella\vella_femalehead_msn.dds
The picture shown below is example after the dds file path changed.
Once you done, save your Nif file (click the save as). Play the game and check your follower. Hope my tutorial can help to solve your problem.